
Setting up a Node.js application in cPanel can be effortless, even for beginners.
Whether you’re new to web development or an aspiring developer, cPanel provides user-friendly options to get your Node.js applications up and running.
This guide will help you set up your Node.js application using the cPanel interface, making it simple enough for those without prior technical knowledge to complete.
Think of Node.js as a magical genie that can make your website come to life. It’s a technology that allows you to run your website’s code and make it do cool things.
cPanel, on the other hand, is like a magical box that holds your website and all its files. It’s a tool that helps you manage your website easily, ensuring it runs smoothly and stays online.
Now, let’s relate this to a real-life scenario:
Imagine you’re baking a cake. Think of your server as your kitchen. It’s where you build and run your website (bake your cake). The ingredients for your cake are like the code and files of your website. You need specific ingredients in the right amounts to make your cake delicious (functional website).
Now, think of Node.js as your recipe. The instructions tell you how to combine the ingredients (code) and bake the cake (run the website). cPanel is like your recipe book. It’s a collection of recipes (tools and settings) that help you bake different types of cakes (websites). Just like each recipe (tool) inside the book (cPanel) helps you create a specific kind of cake (website).
So, you, the aspiring web developer, are like a baker. With the help of Node.js (recipe) and cPanel (recipe book), you can create all sorts of delicious cakes (websites) to share with the world.
By following the right recipes and using the magical powers of Node.js and cPanel, you’ll become a master baker (web developer) in no time!
Also Read: How to Install a PHP Script in cPanel?
Steps to Install Node in cPanel
Now that you understand the basics of cPanel and Node.js, let us list the steps to install Nodes in cPanel.
Just like there are different methods to bake a cake, there are two methods to install Nodes in cPanel.
Method 1:
1. Log in to cPanel.
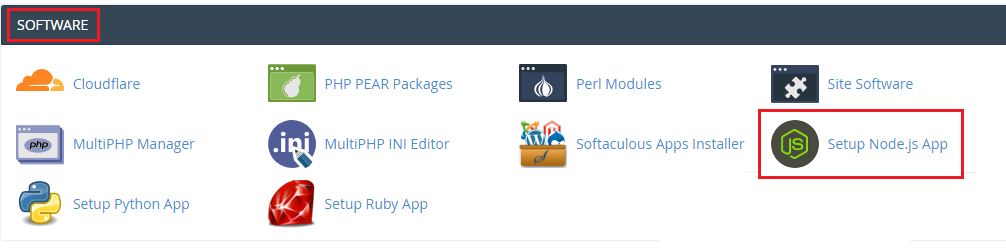
2. In the ‘software’ section of cPanel, click on the ‘Setup Node.js App’ icon.

3. Click the ‘Create Application’ button on the Node.js selector page to start the application setup.

4. Fill in the required fields of the application setup.

➔ Node.js version: Choose the preferred Node.js version from the drop-down list.
- ★ (Note: Versions that are supported include 8.17.0, 9.11.2, 10.24.1, 11.15.0, 12.22.9, 14.20.1, 16.17.1, and 18.14.1.)
➔ Application mode: from the drop-down choices, select Development or Production. You can initially select Development and afterward switch to Production.
➔ Application Root: the application files are kept under the application root on the system. The item will be added to /home/username to create the complete path to the application files in the cPanel home directory.
➔ Application URL: the open-source URL to your application.
➔ Application startup file: the first file that will be processed when beginning the application.
➔ Passenger Log File: In this, You have to define the path along with the file name.
5. Click the ‘Create’ button when the form is complete.
After installing a functioning application, the working set can be improved using the package.json settings file and the npm package manager. Follow the instructions in the following two sections to install package.json and npm.
Also Read: How to upload Laravel Project on Shared Hosting With cPanel?
➢ Create the package JSON.
1. Go back to cPanel’s dashboard. Click the ‘File Manager’ icon to open the file manager in the ‘Files’ section of cPanel.

2. In the left-hand column of File Manager, click the text of the application root folder.
![]()
3. Click the ‘+file’ button to create a new file.
![]()
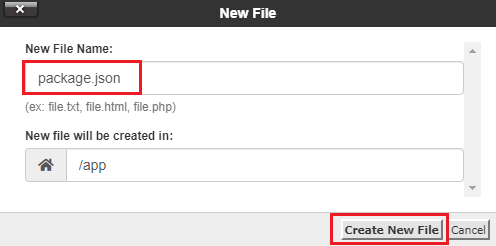
4. Enter the file name ‘package.json’ and click the ‘Create New File’ button in the dialog box.
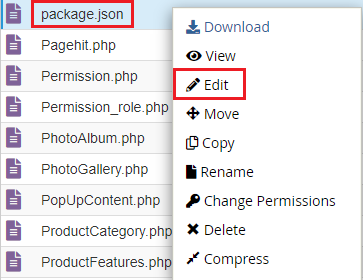
5. Once the file is created, right-click on the package.json file in the right-hand column of File Manager and then click ‘Edit’.
6. An edit dialog box is displayed. Click the ‘OK’ button in the edit dialog box and enter the following text in the editor screen.
| {“name”: “app”,
“version”: “1.0.0”, “description”: “My App”, “main”: “app.js”, “scripts”: { “test”: “echo \”Error: no test specified\” && exit 1″ }, “author”: “”, “license”: “ISC” } |
7. To save files, click on the ‘Save Changes’ button.
![]()
8. Click ‘Close’ to close the editor.
![]()
➢ To install NPM, Follow these steps:
1. In the ‘Software’ section of cPanel, click on the ‘Setup Node.js App’ icon.
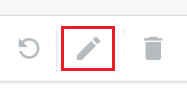
2. In the Actions column of the web applications list, click the ‘Pencil icon’ to edit the application.
3. Click the ‘Run NPM Install’ button.
![]()
The NPM installation runs and presents a success indicator when completed:

To install packages with NPM and do other command-like tasks related to the application, log in via SSH and enter the application’s virtual environment using the command shown in the information box at the top of the application setup page.
Also Read: How to Change Server Timezone in cPanel?
Method 2:
Setting up Node.js Application using Command Line
If you are familiar with SSH, you may find the command line interface faster and easier than the cPanel install interface.
To set up a node.js application from the command line, follow these steps:
1. Connect to your account via SSH.
2. Create the Node.js application with the following command:
| cloudlinux-selector create –json –interpreter nodejs –version 11 –app-root app –domain example.com –app-uri app |
3. Once inside your account’s home directory, change to the application directory.
| cd ~/app |
Open your preferred text editor and create the package.json file. In our example, we’ll use the vi editor,3
| vi package.json |
Press i to change the insert mode and paste the following text into the editor.
| {“name”: “app”,“version”: “1.0.0”,“description”: “My App”,
“main”: “app.js”, “scripts”: { “test”: “echo \”Error: no test specified\” && exit 1″ }, “author”: “”, “license”: “ISC” } |
Press the Escape key followed by: to enter command line mode.
Press x followed by the Enter key to save and exit the vi editor.
4. Install npm by entering the following command.
| cloudlinux-selector install-modules –json –interpreter nodejs –user example –app-root app |
To install packages with NPM and do other command-line tasks related to the application, log in via SSH and enter the virtual environment for the application using the command.
| Source/home/example/nodevenv/app/11/bin/activate && cd /home/example/app |
And there you go! You’ve successfully set up Node.js in your cPanel through the user-friendly interface or the command line for more advanced users.